
How To Fix A Hole In The Wall: Step By Step Guide
Key Takeaways:
- Match the product to the hole: Use lightweight fillers for small dents and flexible options for larger repairs.
- Prep is everything: Always scrape away loose paint or torn paper before you start filling.
- Thin layers win: Build your filler in light coats and “feather” the edges wide to hide the repair.
- Never skip primer: Priming prevents the filler from soaking up your topcoat and looking dull.
If you are looking up how to fix a hole in the wall, the first step is matching your repair method to the size of the damage. A tiny nail hole only needs a quick dab of filler. A larger crater in your plasterboard requires a mesh patch and several thin coats to look right. If you take the time to prep properly, your wall will stay smooth and won’t crack or “flash” once the paint dries.
What Tools And Materials Do You Need To Patch A Hole In The Wall?
You’ll get a much cleaner result if you have the right basics on hand before you start. Beyond a standard filling blade and sandpaper, the most important factor is the filler itself. Because different types of damage react differently to drying and house movement, we recommend choosing your filler based on the specific job at hand.
Quick Selection Guide
| Damage Type | Best Repair Approach | Recommended Product |
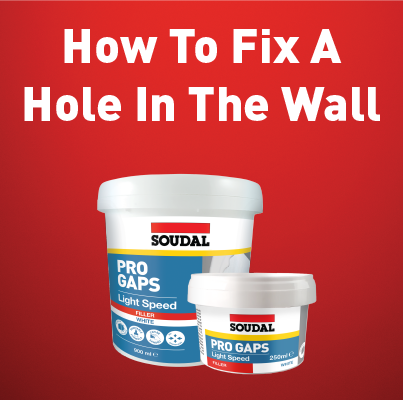
| Small Holes | Direct fill for nail and screw holes | Pro Gaps Light Speed Filler |
| Medium Dents | Shallow fills for chips and scuffs | Pro Gaps Fill & Paint |
| Large Holes | Structural support with a mesh patch | Pro Gaps Fill & Paint |
| Corner Gaps | Flexible sealing for skirting and trim | Pro Gaps Quick Dry |
Once you have your product, identify your wall type. Most New Zealand homes use plasterboard (drywall). You can confirm this by tapping the wall. If it sounds hollow, it is plasterboard. If it feels rock-hard and sounds solid, it is likely older lath and plaster. Learning how to fix a hole in the wall is easiest on plasterboard, but these filling steps work for small chips on any painted surface.
How Do You Fix Small Nail And Screw Holes?
These are usually the “picture hook” holes left behind when you move furniture or art.
- Clean and prep: Wipe the area to remove dust. Use your utility knife to trim away any “burrs” or raised edges of paint and paper.
- Fill the hole: Press your filler into the hole. If you’re looking at how to fix a hole in the wall fast, using a fast-drying plasterboard filler allows you to finish the job in one afternoon. Smooth it over with your blade so it sits flush.
- Sand and paint: Once dry, sand it lightly with fine-grit paper. Apply a quick spot of primer, then your topcoat.
How Do You Patch A Hole In The Wall (Medium Dents)?
Medium damage, like a dent from a door handle, fails when people try to fill it in one thick, gloopy coat.
- Clear the debris: Cut away any flaking paint. Filler won’t bond to loose material.
- Apply the first coat: Use a flexible wall filler to help the repair resist cracking later. Press it in firmly and spread it slightly beyond the edges of the dent.
- Feather the edges: Hold your blade at a low angle and sweep it outward. This thins the filler at the edges so there isn’t a visible “hump” on the wall.
- Dry, sand, and repeat: If the filler shrinks slightly as it dries, add a thin second “skim” coat before your final sand and prime.
How Do You Repair Large Holes In Plasterboard Properly?
If the hole is bigger than a 50c coin, you need to know how to patch a hole in the wall using structural support. Filler alone will eventually sink or crack.
- Square it up: Cut the damaged area into a neat square or rectangle with your utility knife.
- Use a patch: Apply an adhesive mesh patch over the hole. This gives the filler something to “grip” onto.
- Layer and blend: Apply your first layer of filler over the mesh. Once dry, sand it and apply a second, wider layer. The goal is to blend the repair so far out into the wall that the eye can’t see the transition.
- Finish: Sand smooth, prime, and paint. If the wall paint is old, you might need to paint the entire section from corner to corner to hide the patch perfectly.
For a deeper look at which product suits your specific renovation, check out the full Pro Gaps range to find the right match.
How Do You Get A Professional Finish?
The difference between a “home job” and a professional finish is usually in the sanding. Always sand wider than the actual damage. This creates a gradual slope that disappears under paint.
If your issue is actually a crack where the wall meets the skirting board or window frame, don’t use a rigid filler. Those areas move as the house settles. Use a paintable joint sealant instead. You can find more solutions for these tricky spots in our full range of Soudal Sealants, or use our product selector tool to find the ideal solution for your job.
FAQs
How long does wall filler take to dry?
It depends on the depth and the weather. If it feels cool to the touch, it’s still damp. Sanding too early will just gum up your sandpaper and pull the filler out of the hole.
Can you paint straight over wall filler?
We don’t recommend it. Filler is porous and will soak up the moisture in your paint, leaving a dull, flat spot on the wall known as “flashing”. Priming seals the repair so the texture and sheen match the rest of the wall.
What is the easiest way to fix a hole in the wall?
For small damage, using a lightweight, ready-mixed filler is the easiest method. It requires no mixing and very little sanding compared to traditional heavy-duty compounds.
Why does my wall repair keep cracking?
Cracks usually return because of house movement or because the filler was applied too thick in one go. Using a flexible product like Pro Gaps Fill & Paint can help the repair move with your home.